

| Car: | BMW | 3 Series | E46 | M Sport | Cabriolet |
| Engine: | M47TU | 0 | Inline 4 | (16v Common Rail DI) | Turbocharged | Diesel |
E46 Bluetooth Retrofit
Bluetooth can be fitted to any of the E46 range including cars that were manufactured before Bluetooth's inception in 2003, this is made possible by virtue of a modular Infotainment/Telematics/Audio wiring sub loom that disconnects at the front of the car, behind the dashboard.
About this article
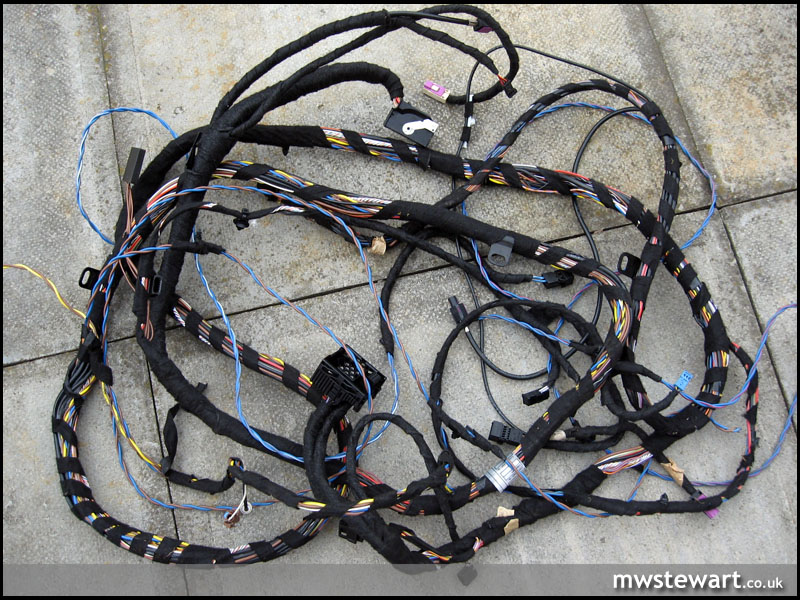
This article details my Bluetooth retrofit in to my 2005 Cabriolet with Business CD head unit, and does not use the BMW retrofit loom; instead I stripped the Bluetooth system from a scrap car. At £80 for the complete system this approach represents a considerable saving over the official retrofit path; I believe the retrofit loom is £120 alone. I also find this approach to adding systems more enjoyable but of course that's subjective!
The donor vehicle used for this retrofit was a Saloon and additional steps were required to convert the loom to fit a Cabriolet. This conversion is covered under a separate heading at the end of the article. Please note that if you have Navigation then the retrofit is fundamentally the same just you will either need a donor loom with Navigation, or splice a Bluetooth loom in to your navigation loom (not more difficult than the retrofit itself).
Parts required
Parts list:
- Bluetooth antenna, bracket and nuts
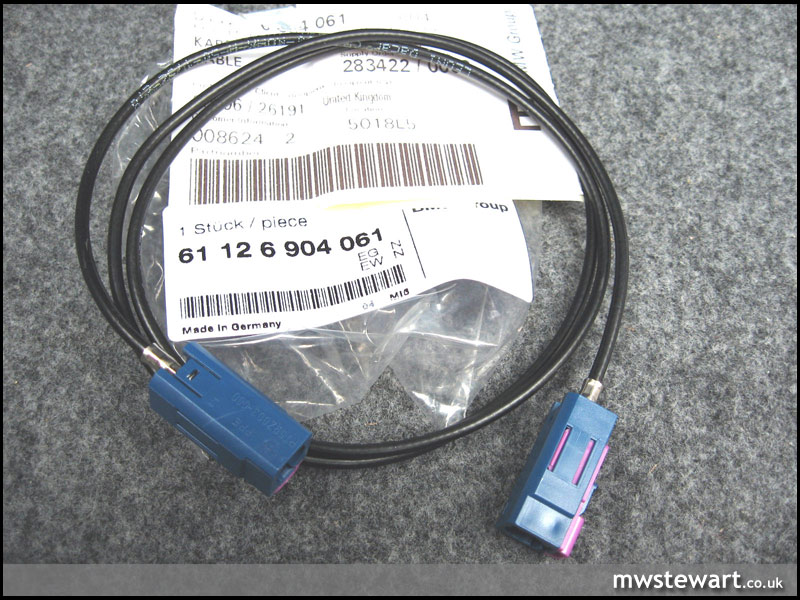
- Bluetooth equipped wiring loom
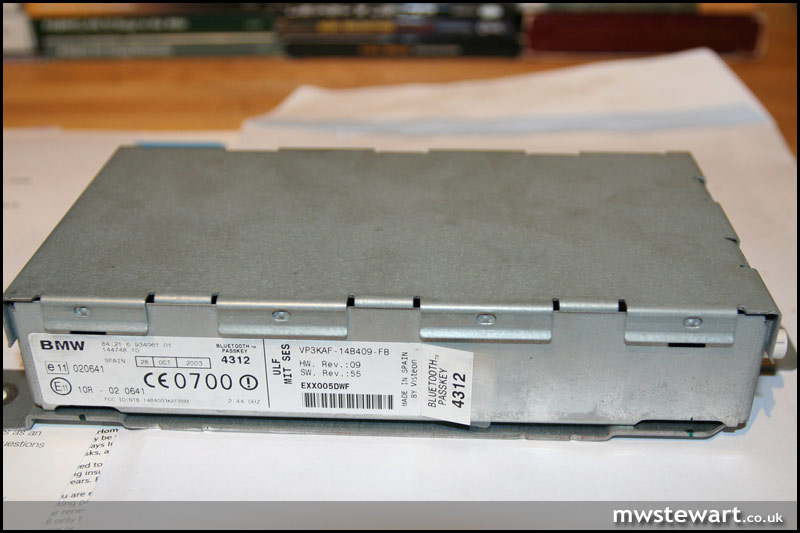
- Bluetooth ULF1
- Microphone
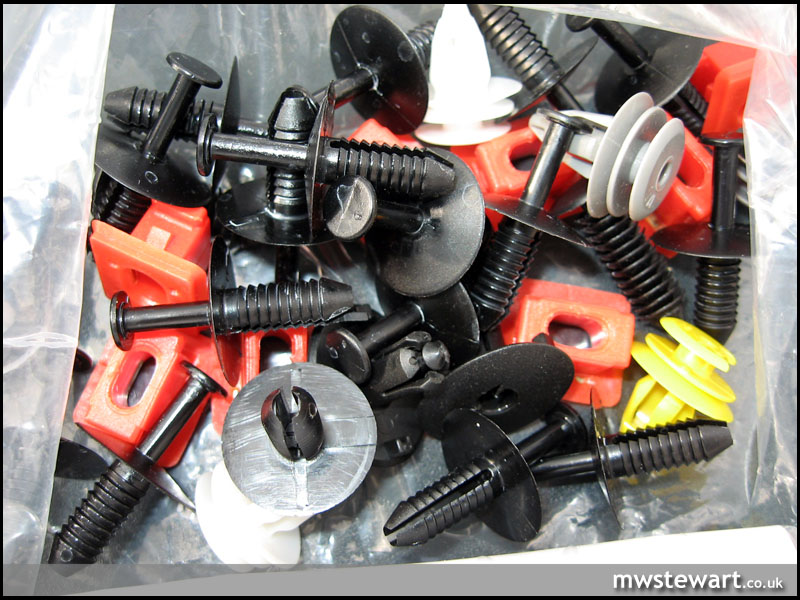
- Spare trim clips (optional)
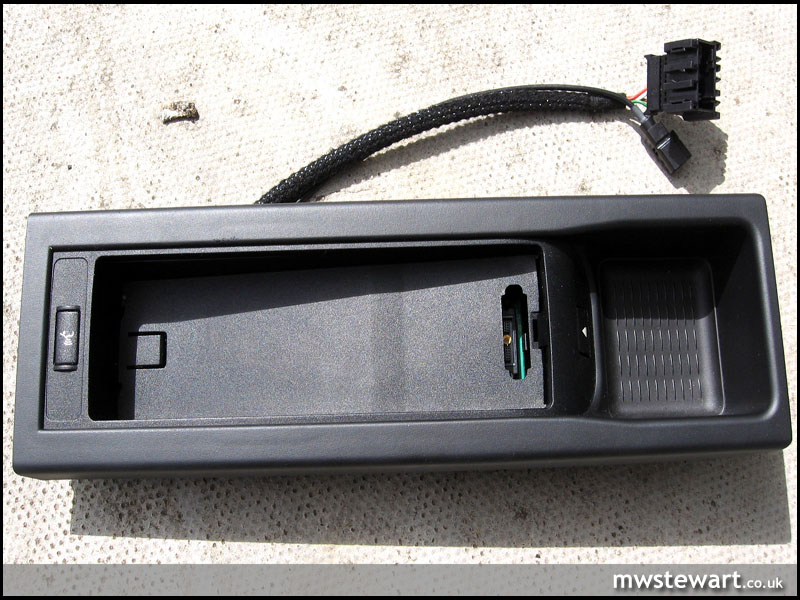
- Telephone eject box with pairing button2
1 For ULF information please click here.
2 The Cabriolet uses a dedicated antenna mounted behind the rear bumper, however I made use of the existing Radio antenna. Please see
this section at the end of the article for details.
Bluetooth retrofit
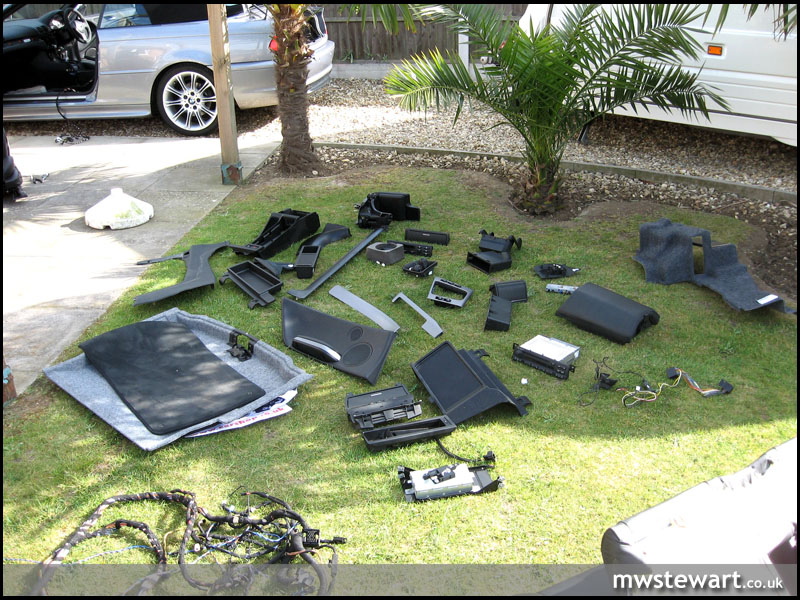
To start this retrofit the following parts need to be removed from the car, in this order:
- Boot liner and passenger side carpet trim
- Disconnect battery!
- Dashboard belt line trim (2 main sections) Head unit
- HVAC unit
- Gear lever gaitor and trim piece
- Front ash tray and mounting cage
- Passenger seat
- Front arm rest (if fitted)
- Centre console (complete)
- Rear seat bench
- Rear seat upright
- Passenger side rear quarter trim
- Passenger side sill trim
- Passenger side kick panel
- Lift front passenger side carpet
The process is essentially a wiring loom swap but with the addition of mounting some extra pieces of hardware.

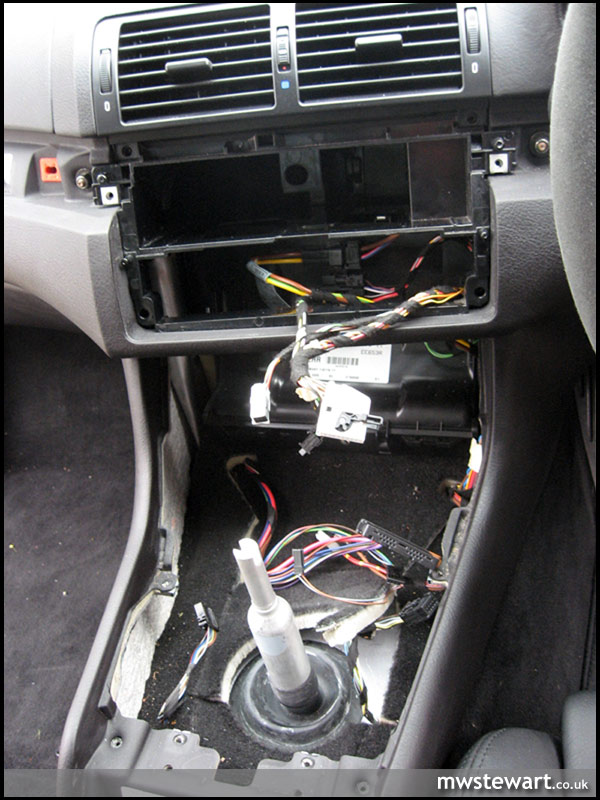
To start removing the old loom first disconnect it at the multiplug located behind where the HVAC unit was mounted. Disconnect the larger of the two plugs shown in the photo (right).
With the passenger side carpet lifted begin to pass down the old loom underneath the carpet and behind the centre console..

Follow the loom all the way to the boot where it must be disconnected from the CD changer (if installed), the external antenna, earth post and also the Diversity switching unit.
I found life was made simpler by removing the diversity switch rather than trying to disconnect the 3 Fakra connectors in situ (left).

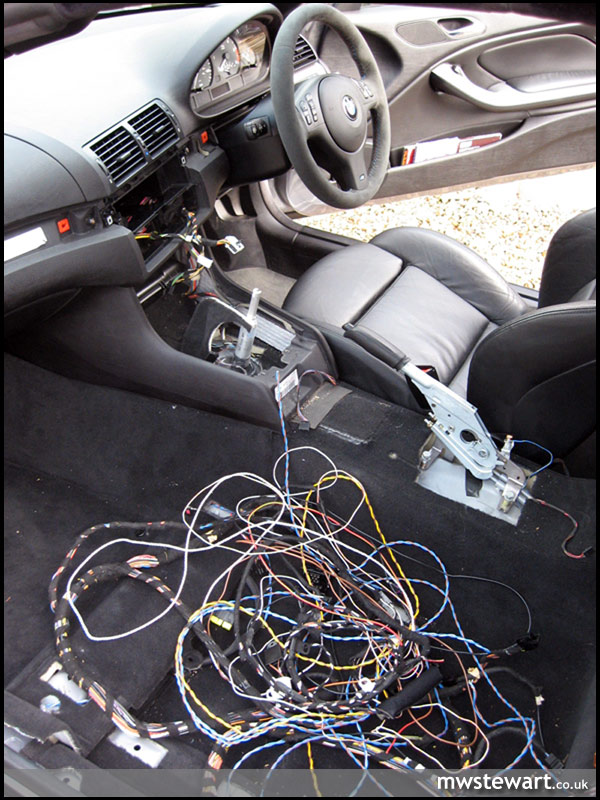
To save a considerable amount of time I cut the 4 pairs of speaker wires along with the CD changer power wire which for some reason double backs on itself and under the drivers side carpet (right). This saved me from removing the drivers side seat, carpet and kick panels.
These can all be simply soldered back to finish the installation.

Now lay the new loom at the front of the car and tuck the head unit connectors underneath the carpet in the passenger side foot well, and up inside the centre console (left).
From here, connect to the car loom using the multiplug behind the HVAC unit, this will give an accurate starting position from which to continue installing the loom.

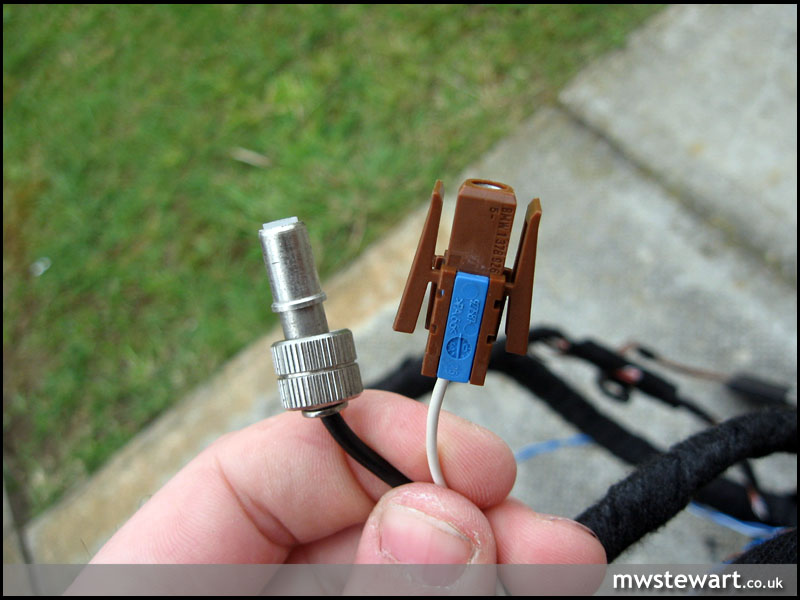
You will notice there are new connectors at the front 1) Black multiplug 2) Coax lead (short) 3) Coax lead (long) 4) light Blue multiplug. Pass these underneath the carpet between the gear lever and handbrake. The Black multiplug and short Coax lead need to exit beside the handbrake (right).
The long Coax lead needs to exit from the carpet directly behind the handbrake.

The light Blue multiplug's position is dependant on what Microphone is used. I recommend the late type microphone as it offers improved sound quality, see the section below for details. If you opt for an early microphone then locate the blue multiplug next to the gear lever. If you decide on a late microphone, remove the upper steering column shroud and route the blue plug behind the dashboard and up to the steering column area using the existing wiring route (left).

Refit the centre arm rest and attach the Bluetooth antenna to the rear of it as shown in the photo (right). The centre console may now be completely re-assembled along with the rest of the dashboard.
When refitting the centre console, leave off the handbrake gaitor and ensure that the Black multiplug and short coax lead can be reached.

If you took the easy route and cut the speaker wires then now is the time to solder them back together and lay the passenger carpet back down, before which taking the time to admire the seam welded shell!
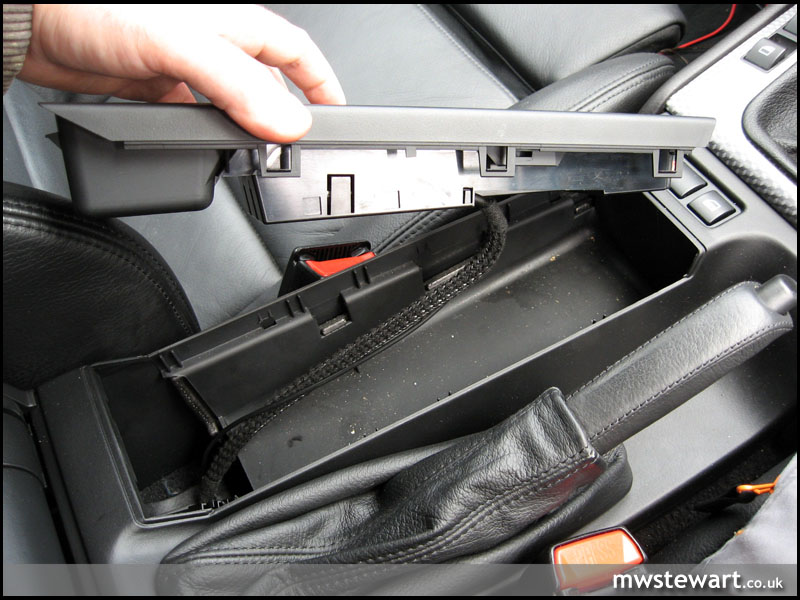
Returning to the centre console the eject box can now be installed, the connectors are completely fool proof (left).

The eject box simply snaps in to place replacing whatever unit you had there before (cup holders, coin storage, cassette storage, stowage bin etc) (right).
Install the handbrake gaitor after taking the time to re-asjust the handbrake if necessary, then the passenger seat and sill/kick trims.

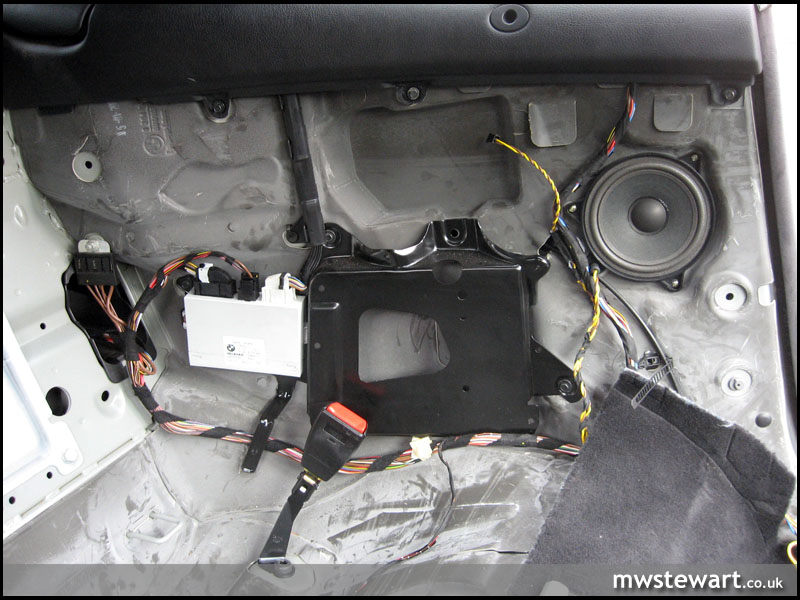
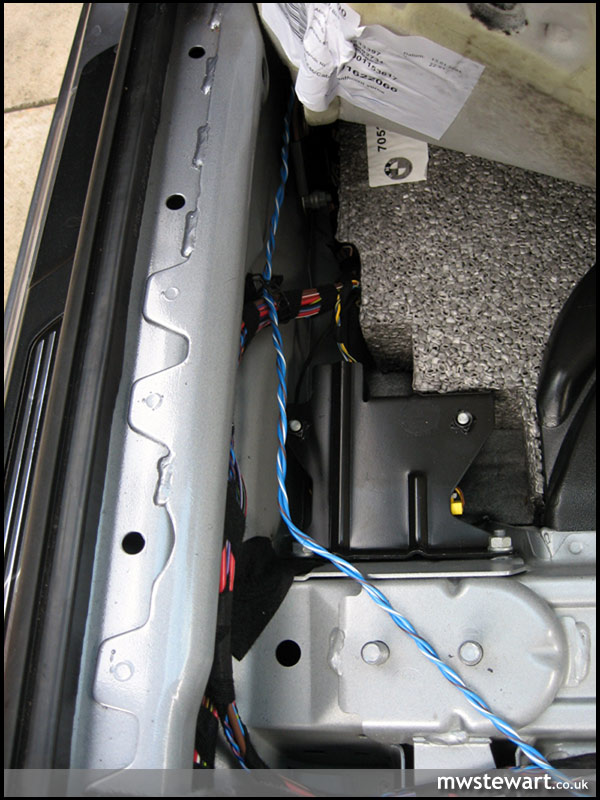
Now paying attention to the rear of the car, install the rear speaker connections and pass the loom through the hole in to the boot area. The rear seats and rear quarter panel can then be reinstalled.
Once in the boot area mount the ULF in the position of your choice (left).

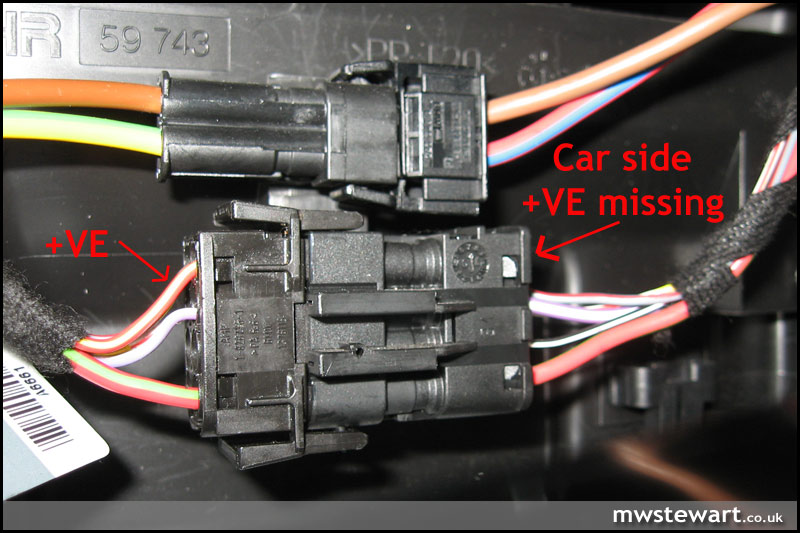
Something I discovered during the installation is that my car did not have a required fuse (39) and corresponding +ve pin on the main loom side of the front loom connector. The wire in question is red with a yellow tracer.
Rather than install a new fuse and pin in the connector I bridged ULF pin 17 to 35 (right). The only ramification of this is that the phone will only charge with the ignition on, rather than all the time. This was of no real concern to me.
Cabriolet microphone
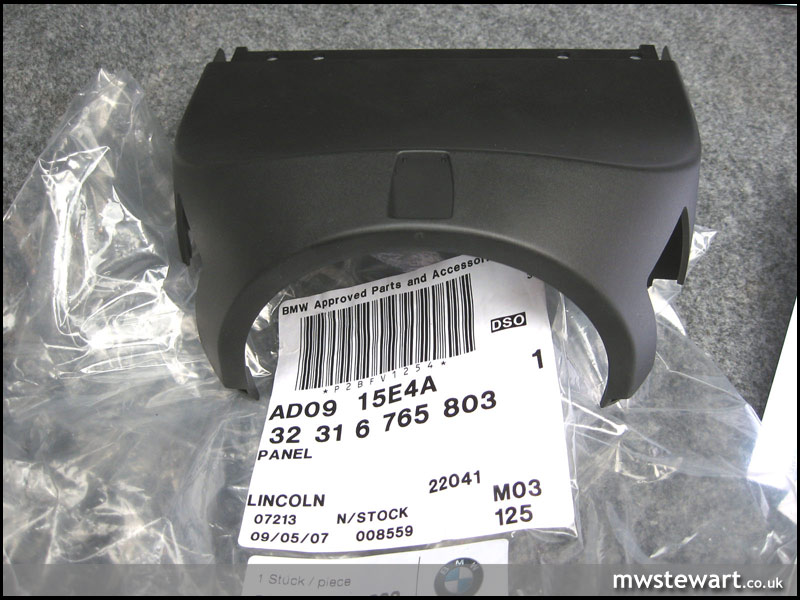
Cabriolet's manufactured prior to 2005 have the microphone installed next to the front interior light, behind a grille. After 2005 the microphone was mounted on the steering column to increase sound quality and improve voice recognition performance. As mine is an '05 car I wanted the installation to remain OEM and so opted for this setup which requires the following parts from BMW:
- 32 31 6 765 803 Panel
- 34 31 6 937 391 Microphone

The new Microphone is different to previous units as it combines the signal ground with the shielding ground in one Black wire, and has a different type of multiplug fitted.
I used the light Blue female multiplug from a standard microphone (removed from the scrap car) and soldered it on to the new microphone connector. The silver shielding ground on the car side is now not connected, Yellow on the car side goes to White on the mic, and Black goes to Black.
Snap in adapters
Snap in adapters are available from BMW to replace the standard 'oddments tray'. I purchased one for a K750i, as my W810i is based on this phone it fits perfectly (after removing the external antenna cover on its rear side).
If, like mine, your snap in has angled front sides to suit newer BMW models then an additional finishing trim piece is required at around £5 which covers the gaps (it's not fitted in the following photos).


Convert a Compact/Coupe/Saloon/Touring Bluetooth loom to suit a Cabriolet
A few changes need to be made if you are using a Compact/Coupe/Saloon or Touring loom in your Cabriolet.
There are differences in the diversity antenna system between models; a Cabriolet uses a rear mounted external aerial and a second dedicated FM antenna located under the hood stowage flap. Compact/Coupe/Saloon/Touring models use antennas mounted around the rear window. As a result the loom and the connectors are different between these models, and also between model years. Early cars use regular SMB connectors where late cars use Amphenol Fakra connectors.

The first step then is to remove the existing aerial wires from your original Cabriolet loom and swap them with those in your Bluetooth donor loom. To do this simply remove the loom tape and begin to trace the wires along the looms. There will be one black Coax cable running from the head unit (right) to the rear aerial, and one white wire running from the head unit which runs to the rear of the car and splits in to 2; one for the external aerial and one for the diversity antenna switch . This is simply a power lead switched by the head unit.

The white antenna power wire can be cut on your original loom just ahead of where it splits to 2 wires. Cut the white wire at the same point on the new Bluetooth loom and remove it reward of the cut, along with all the entire antenna Coax lead.
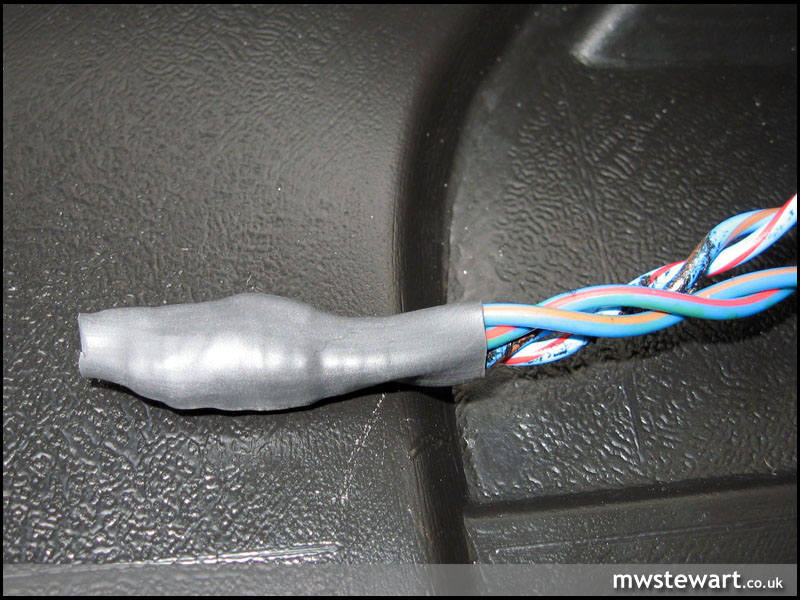
When finished, you should the aerial wires and have something that looks like the loom in the left photo.

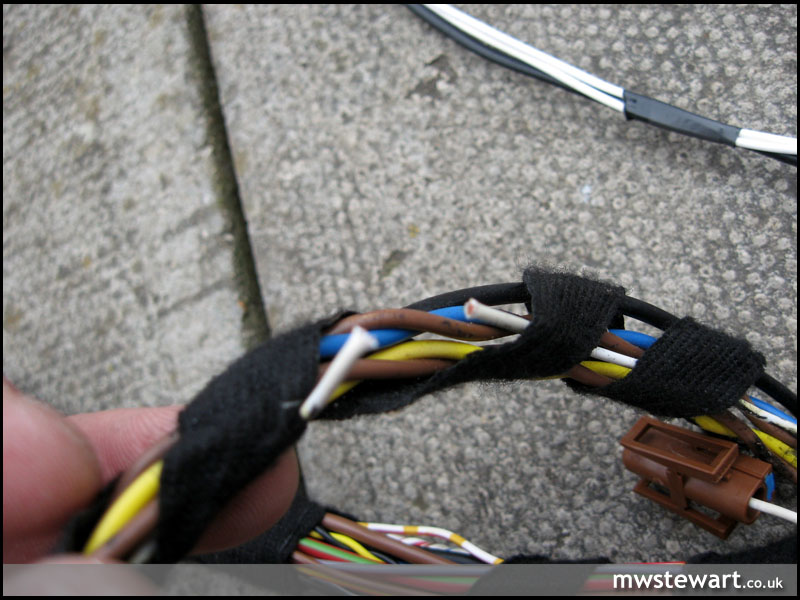
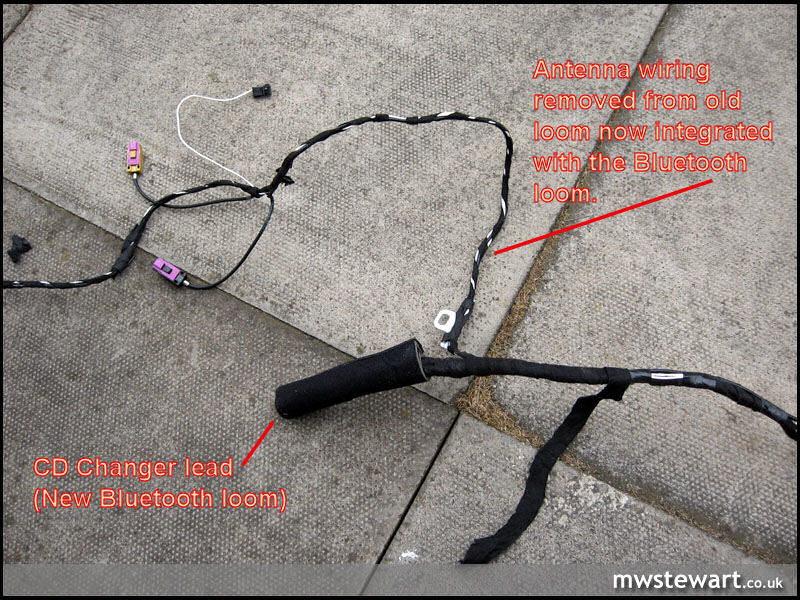
Discard the antenna wires removed from the Bluetooth loom (incorrect fittings) along with your original loom, thus leaving the new Bluetooth loom (minus it's aerial wiring) and the aerial wiring removed from your original loom. These two can now be integrated, to do this simply tape the original antenna wiring to the new Bluetooth loom, starting with the Antenna cable (red ellipse - right photo) approximately 6" ahead of the head unit quad lock connector.

Continue to tape the looms together leaving a 6" either side of where the cut white wires meet. The new Bluetooth loom will now have the correct antenna wiring arrangement at the rear of the car, rearward of the CD changer lead.
Next solder the antenna power wires together (left photo) and tape up this section to finish this part of the conversion.

Rear speaker wires will require modification to fit the Cabriolet, which has unique end connectors to suit the separate mid range and bass units in the rear quarter panels.
The simplest option is to cut the Cabriolet connectors from the old loom and solder them in place of those the donor Bluetooth loom (right).

One final modification required is to extend the earth fly lead on the Bluetooth loom. The earth point on the Cabriolet is right at the Left hand side rear quarter of the car. The Compact/Coupe/Saloon/Touring looms need extending to reach.
Use wire cut from the original loom to do this (left).

A final note re: Telephone aerial. Looking inside the boot up at the Cabriolet radio aerial I noticed it has an additional Fakra connector labelled 'Telephone' (right).
I modified a Cabriolet FM antenna lead to join the OEM Telephone aerial lead to the Cabriolet external antenna, rather than buy the dedicated version from BMW which mounts behind the rear bumper.
© Mark Stewart, Saturday 12th May 2007![[XML RSS Feed]](/images/xml/xml_rss.jpg)