
| Car: | Ford | Fiesta | CX (Mk3) | XR2i | Hatchback |
| Engine: | BUB | 3189 | V6 | (15º V6) | N/A | Petrol |
HiFi
I did not originally plan to fit any sort of largely uprated system, maybe a couple of speakers and CD player but that was it. I did not think it was worth wasting money on stereo equipment to go into something with terrible acoustics. I had a listen to a couple of friends systems and was converted!
Source and Amplification
I choose a Kenwood tape MASK head unit to compliment the rest of the system, these are very secure units as mine in particular requires a transponder to activate it after power has been removed. The internal amplifier is 4x45w of which I will use the rear to power the 6x9's. So the warranty isn't invalidated, an adaptor lead is required to convert the Ford speaker and power connectors to an ISO style connector. The unit features front and rear RCA preouts which I have used for the 2 amplifiers. There will shortly be a 10 disc CD changer fitted to the glove box.
I have installed 2 Kenwood amplifiers, a 2x75w for the front components and a 1x150w for the Subwoofer
Front Speakers
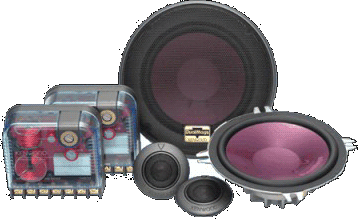
The first item I acquired was a set of Kenwood front components. These comprise of a midrange driver, tweeter and crossover network.
This creates the best sound staging possible by physically separating the midrange and treble. The crossover network takes a feed from the source and from here there are several connection options available. I choose to cut the bass completely from the midrange and run the tweeters on the +15db setting.
To mount the midrange drivers in the standard Ford apertures, adapter plates are required, these simply screw in and give a new set of mounting holes for the Kenwood units. I sealed behind the adaptor plate for the best sound, and did the same to all the other holes in the door.
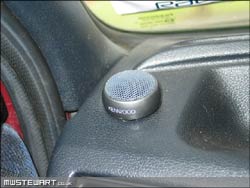
The speaker cable I used throughout was the same I use for my home separates system, and as a result is not really designed with a car installation in mind. The cable is very large and extremely hard, it would have been near impossible to route it along the standard mirrors/locks/windows gaitor. To get around the problem I cut a small slice in an unused grommet and fed the wire through into the door. It is visible when you open the door but still looks neat.
The crossover networks are mounted in each kick panel with strong double sided tape. All wires were secured along the standard Ford runs.
Rear Speakers
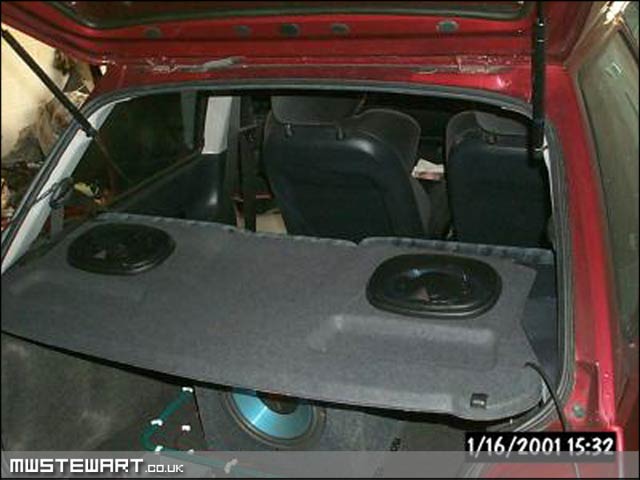
For the 'rear fill' I brought some Kenwood 4 way 6x9 Speakers, I thought I may as well buy a matched system! I wanted to fit them in the parcel shelf but didn't want to spend £80 or so on an MDF item, when one can be knocked up at home for less than a quarter of the cost!!
I have decided not to hide the speakers on my installation as the car is rarely left anywhere other than a private driveweay or locked garage. If your car is left in car parks etc I would advise making an acoustic shelf where the speakers can be hidden underneath. I decided to mount them on the standard Ford shelf to retain the factory look.
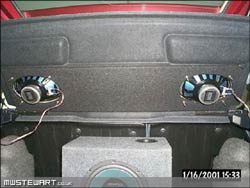
Although the Ford parcel shelf was up to the task of holding a pair of speakers, I didn't want to risk it sagging in the future. My Dad helped me to mark out the position of the speakers and cut the holes. Next my Dad cut a piece of ply to run along the bottom of the shelf, joining the two speakers. The speakers bolt through this each end and hold it securely in place, reinforcing the whole shelf.
This looked rather unsightly on its own so I brought some black carpet and glued/stapled this to the wood - the result is a professional looking installation (above left).
The wires running from the head unit to the speakers will be upgraded at a later date, and neatly clipped to the reinforcing plywood. As the subwoofer provides enough bass I am considering some bass blocking capacitors to prolong the life of the speakers.
Subwoofer
The subwoofer again is a Kenwood unit, it is a 10" ported box type. The box is MDF - the only modifications I have made is to line the box with lead sandwich and a thin layer of acoustic felt. I also replaced the speaker to terminal link with higher quality cable and connectors.
Boot installation
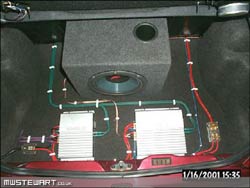
I want the installation to be as practical as possible, so the boot can be used for storage on the way to clubs etc. To get around this my Dad cut me a piece of ply using the boot carpet as a template - I stuck the original Ford boot carpet onto this which gives me something solid to screw cables/amps etc into.
I marked the position of the amplifiers and sub box onto the carpet in white pencil to plan the cable runs out - this took a little time and patience though to plan the neatest routes, and avoid mixing power cables with signal cables. Once planned out I screwed everything to the board and held the cables down with nail-down cable ties.
There is also a carpeted false floor in two sections to cover up the amps/wires so most of the boot space still remains.
© Mark Stewart, Friday 15th June 2001
![[XML RSS Feed]](/images/xml/xml_rss.jpg)