

| Car: | Ford | Fiesta | CX (Mk3) | XR2i | Hatchback |
| Engine: | BUB | 3189 | V6 | (15º V6) | N/A | Petrol |
VAG R32 3.2 V6 4X4 (Quattro) Fiesta project
20092008
2007
2006
2005
2009 will see a departure from the generation 1 Haldex and 2.0T, and see VAG 3.2 VR6(R32) Power and a Haldex Gen2 drivetrain.
The plan is to use the floor pan from a Golf Mk5 R32 and mate this carefully and safely in to the Fiesta shell, making adjustments and reinforcements where necessary. I will be using as much of the Golf equipment as possible without compromising weight, bespoke lightweight equivalents will be used in place of OEM, where savings can be made.
© Mark Stewart, Thursday 1st January 2009Fiesta Quattro - 2006
28/10/2006
The shell is now all shot blasted and prepared, all clean and ready for work to commence:

Here's a new toy I've purchased to make life a lot easier:

A switchable horizontal and vertical laser line (self levelling if required):

23/09/2006
I'm the process of shot blasting the enture underneath to remove any surface rust that appeared since I last worked on the car (some parts were left bare metal). It's a crap job but needs must!
I'm using Dinitrol RC800 to seal the bare metal. I was going to use etch primer first but I undestand that it's slightly porous, so if you leave it unpainted for a length of time then you get rust underneath the primer (especially this time of year). The RC800 is organic acid based and it 'etches' in to the metal and leaves a totally impermeable seal. It neutralises rust that's already there and is also overpaintable.

It's a milky colour, turns blue the minute you paint it on and fully dries black after 12 hours or so.


01/05/2006
The rear diff subframe requires two new crossmembers, one on the boot floor and one underneath the rear seat. The rear most member was very time consuming as the boot floor is anything but flat:

I've welded in tube where the subframe mounting bolts will pass through, and up to the boot floor (which will be reinforced):

On the car:

And here's the subframe bolted up complete with ARB:

17/04/2006
I've now fully prepared the bottom of the car, it's all seam welded and I've spent a while taking the majority back to bare metal, or as good as. This is to ensure I've got rid of all the corrosion as even on a shell like mine it's surprising the amount of undetectable 'spiders' you can find under the etch primer (these start from stone chips).


With the shell underneath prepared I can start to work out where is best to begin strengthening. I'm starting with parts used from the Mk5.

These will extend forward to reinforce the rear wishbone mounting point and also go forward up to the bulkhead.

I was also lacking some suitable gearbox mounts, I had to travel a surprising distance to get these, just the sort of part that gets thrown away when a car is broken!

It's time to get the engine in and in position so that I can see where to modify the floor and also where best to place the prop shaft. The first obstacle was the rear gearbox mounting lug on the Zetec block, this together with another mount on the sump were completely in the way of the Audi driveshaft output.

These were duly removed, and here the crankcase is exposed; this will be covered with a plate that will be secured by 4 bolts with threads drilled and tapped in each corner of the exposed area. The plate will also serve as the rear take off for the breather system.

The gearbox alone could now be fitted to the engine, and preparation for fitting the transfer case could commence.


The transfer box proved to be an extremely close fit, initially 2 castings on the Zetec block were in the way.

These were removed.

On the transfer case itself, I needed to remove one of the lugs that secures the casing to the engine block. As the Zetec block is totally different to the Audi 1.8T block, I will be designing a bespoke bracket that will replace this mount anyway.

Finally the entire assembly bolted together. I now need to design some adapter plates to join the Zetec lugs to the Audi gearbox lugs, as most are in differing places.


With this work done I can now position the power train in the bay, and begin to make the engine mounting brackets.

08/04/2006
I've been pretty slack with the car recently, not done anything for weeks! Got stuck back in this past few days though stripped the remainder of the underseal, exposed the seams and welded them.
I'm going all out with the seam welding, going beyond what would normally be done...but every little helps :)


12/03/2006
Audi 02M Quattro 6 speed gearbox & transfer box:

Point of note: the top bellhousing bolt centres are at 135mm - exactly the same as the Ford Zetec, Interesting! However the input shaft position does not match.

Transfer box:

Input side:

O/S output:

Combined:

I also picked up a spare set of driveshafts & CV's:

03/03/2006


The metal has arrived for the rear diff mount, it is 100x50mm*2mm ERW box section. I also have some ERW tube to reinforce the areas where the mounting bolts will pass through the box section. I carried on with preparing the rear of the car today, removing the 2 spare wheel carrier mounting brackets and removing the rest of the underseal ready for welding.
02/03/2006


Cleaned the exhaust tunnel in order to remove all of the Waxoyl, this took a considerable amount of time with rags and a toothbrush and no doubt the wax in the seams will come back and haunt me when it's time to start priming & painting.
At the rear of the car I started to prepare the boot floor area for the fabrication work required to mount the diff, starting today by removing the boot floor reinforcing piece.
28/02/2006


I have taken a few more photo's as a record of how the shell is now, before any modifications.
27/02/2006


I spent a little time today swivelling the shell into place so I can begin work on the underside. This was a 2 man job as clearance was minimal between the garage door opener and the top edge of the shell, my Dad kindly spent half an hour with me holding the shell while I adjusted the height of the stands and locked them in place with bolts.
I'm out of garage space at the moment! 2 interiors, 2 sets of wheels, 2 sets of suspension, an RS2K 4x4 rear end and numerous other things are making it difficult to work on the car, hopefully by the end of next week all of the parts that I don't need will be sold, giving me back some much needed space!
22/02/2006


I've decided to make some modifications to the rotisserie stands. As it will make it a lot easier for me to have the drivetrain mounted whilst the car is on its side I wanted to make sure the mounting points on the car were up to taking the extra weight.
The images to the right show the original mounting brackets which used the existing bumper mounts, these are fine for the empty shell but wouldn't take much more weight.
At the rear I made two extensions that loop underneath the rear valence and sit against he rear chassis rails, from here the brackets can be bolted through the chassis rail and into the boot area via the OEM tow bar mounts.


For the front I made another bracket that went through the front tow eye recess in the valence and sat flush against the front cross member, this could then be bolted through into the 2 existing gearbox cradle mounts.


13/02/2006
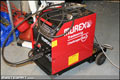

I decided to treat myself to a new welder and chose a Murex on the recommendation of my friend Steve over at RSBible. I wouldn't hesitate to recommend a Murex to anybody, it's solid as a rock even on the lower power settings.
February 2006
I've been working on the car when I can, a lot of time has been spent organising all my Fiesta spares and creating a catalogue so that I know what I have. I've got the shell stripped and have removed pretty much every fitting bar a few clips (which will be removed in due course). I hate overspray on anything, even if it's not seen!
I seam welded the interior of the car this month, rather than update this project log with lots of very similar looking photo's on different dates I have decided to write a separate article detailing what's involved in seam welding, the reasons behind it and lots of accompanying images. There article can be found here.
24/01/2006
Small update, we have the Drivetrain! It's a lovely piece of kit; very solid construction yet lightweight. It has been proven to take 550bhp by the HPA Biturbo R32, so it should be OK for me.

Typical VAG attention to detail (I have a lot of respect for their work, it's some of the best in the business IMO) with the line routing and that highly effective green anti-corrosion treatment of bolts.


Box section arms.


The Haldex unit and rear diff.

Late type forged aluminium calipers, I will be using these as my handbrake calipers.
Not much of an update, I've spent the day cataloguing my spares as Dad has kindly given me the loft in one of the garages to keep all my Fiesta parts. It's amazing what you collect! I've still got to strip out the interior, headlining, glass and loom - pretty mundane stuff. I hope to have the car on its side by Friday and then I can mount the diff. I've been planning it all in my head over the last couple of days and now have it all worked out including the suspension arms.


More soon.
22/01/2006
Finally, now my 2 FRST's have been sold I can devote a bit more time to this project, things can really start moving now.

I spent today making a set of spits (now another customers are finished).


The rest of the day was spent stripping the car down to a bare shell.


The shell is totally mint, better than most Mk5's.
I'm going to Kent in the morning to pick up the entire underpinnings of a 2003 Audi TT quattro. I'm researching the system with a view to making a custom controller. I have some pretty trick plans for the electronic torque bias, it should be a Ford first when completed.
© Mark Stewart, Sunday 31st December 2006![[XML RSS Feed]](/images/xml/xml_rss.jpg)